Wi-Fi Setup (Windows 10)
If Calybra has been previously configured and the wi-fi module is present in the USB port, it can be connected to a wi-fi network.
Turn on Calybra and when the following screen appears

press the button OFF! [small] (https://www.naonix.it/userguide/Images/IT/Off.png) and after the request to Exit, press the button NO.

Repeat the operation two more times. (OFF - NO - OFF - NO - OFF - NO)
Plug the wi-fi device into one of Calybra's two USB ports.
Press the KEYBOARD icon on the screen

and then press the Windows key
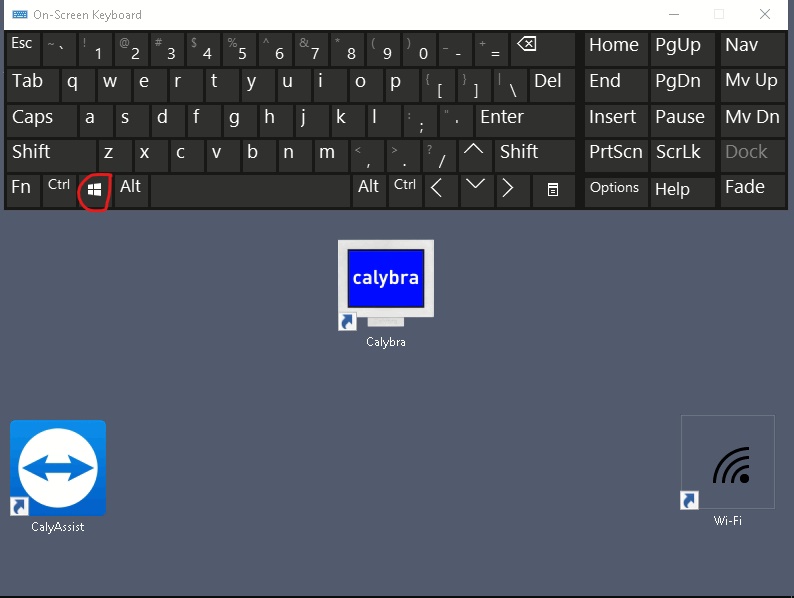
to bring up the bottom bar.
In the lower right part near the time, the wi-fi signal icon will appear. Press the icon to bring up the list of available wi-fi networks.

Select the desired network and press CONNECT.
The window for entering the wi-fi password will appear.
If the wi-fi modem has the WPS button, press it to automatically configure the connection, otherwise, enter the wi-fi password using the on-screen keyboard.
Wait until the connection is established.
If a connection type request mask appears, press the BENCH (Public Network) icon. (This is usually only asked on Windows 7 Operating Systems)
If the connection is not established, repeat the procedure making sure to enter the password correctly. Preferably use the WPS button on the modem.
The connection can also be made using the latest generation smartphone; The password to be entered in Calybra is indicated by the device.
Activate the internet network sharing function (Access Point or Wi-Fi Router) on the smartphone.
Instructions for activating the function are easily available on the internet.